
Narrowed Final Photoshoot
- liaavidan
- Mar 30, 2023
- 9 min read
Updated: Apr 14, 2023
Of my multiple final photoshoot images, I narrowed down my images to my most successful ones—images I am most likely to include in my magazine (they are subject to change). Narrowing down my final photoshoot images helped me plan my ideas for my magazine’s cover image and content in my double-page spread. It also helped me organize my shots, considering I took extra, and determine if future photoshoots are necessary.
Final Photoshoot Part 1 (Home Photoshoot)
Homemade Oreo Cheesecake
Ingredients:


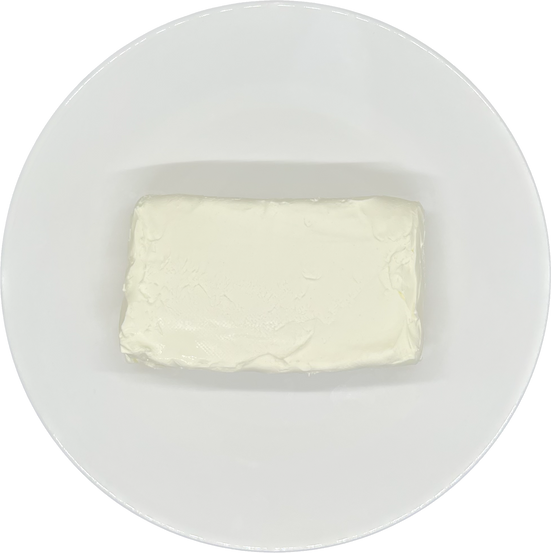


The first set of images I kept from my final photoshoot was of the ingredients; I kept the individual shots without the packaging rather than the singular shot of them in their packaging. I took these images via a photography light box, which enhanced the lighting of my filming location through LED lights. I then removed the background of each image using the iPhone feature that allows you to tap on the subject you want to isolate, instantly and cleanly producing transparent images. A challenge I experienced while taking these shots was that some parts of the heavy cream looked whiter than others; no matter how much I photographed the heavy cream, along with different angles, the cream still appeared this way (I assume because of shadows)
These images are essential for my magazine’s double-page spread as they display each food necessary to make the Oreo cheesecake recipe. In other words, my audience can look at these images instead of time-consumingly reading the ingredients list. These images are successful as they are well-lit, display the small details of each ingredient (such as the shininess of the sour cream), and look neat (for example, the sides of the bowls are clean without crumbs).
To achieve a better photoshoot result, I rotated the shots of the heavy cream and eggs 180 degrees clockwise for each mug’s handle to point to the right; not editing these photos would display inconsistency, a quality I don’t want my images to evoke. Since all of the ingredient images above, besides the cream cheese, are proportionate to its Oreo cheesecake recipe, I want to edit the cream cheese image in Photoshop. I will edit the image to show three blocks of cream cheese and resemble the quantity needed to make the recipe. I may also edit the shots of the ingredients to create a composite image, depending on the format I decide for my magazine’s double-page spread.
Baking Process:


Of the images in my final photoshoot that documented the process of preparing the Oreo cheesecake batter, I chose these as they were most relevant for showing how to create the dessert. For example, I originally photographed Oreos in the food processor when preparing the cheesecake’s crust and filling. However, only one photo of the Oreos in the food processor is necessary, as it would otherwise be redundant; I chose to keep the photo of the Oreos in the food processor when preparing the cheesecake's crust since it requires more Oreos, and therefore, there was more of them in the food processor (showing more of the subject and less of the equipment). I also photographed adding the sugar, flour, and salt into the mixing bowl. As these steps are relatively similar and I will mention them as one step of my recipe, I only need one image. I chose the shot of pouring in the sugar since the image had finer quality and looked more clear and impressive. In particular, the photo of me sifting the flour wasn’t very obvious, especially if one isn’t familiar with sifting ingredients. Similarly, the salt image wasn’t as eye-catching since the sugar image was of me in motion. I haven’t yet changed/edited any of these photos, yet I will if necessary.
Decorating:


I only narrowed down this portion of my photoshoot by two photos. I photographed the chocolate and white chocolate separately and then together to decide which looked the best. As I liked the image of the ganaches together (it shows the comparison more than when in separate photos), I won’t include the individual shots of the ganaches in my magazine's double-page spread. My other images are essential for showing clear directions on achieving the same decoration as my Oreo cheesecake. Yet, I could’ve been more specific had I replaced the third shot with me showing my method in creating the swirled effect with the ganaches; I could’ve shown myself swirling the ganaches with a toothpick, allowing for less confusion on how to reach the final product of the cheesecake. The fourth image was my most successful shot out of these images since it was a close-up that was well-lit, captured its shininess, and looked appealing.
Final Product:


The next part of my final photoshoot involved taking photos of the final product of my Oreo cheesecake. I narrowed this part of my photoshoot to three images, one for my magazine’s cover image and two for my double-page spread. In the second image, I experimented with a shot I’ve never tried, with a slice of the dessert in focus and the rest blurred in the background; I used portrait mode to achieve this result. I was content with the outcome of this set of images. More specifically, I like how the plate in the third image is bright and eye-catching, differing from the cheesecake’s neutral colors (black and white).
Homemade No-Bake Oreo Cheesecake:


The two images above are of the final product of my homemade no-bake cheesecake. Compared to the baked Oreo cheesecake, this cheesecake required fewer photos as I won’t be displaying images to go along with the recipe for this dessert. Instead, I decided that only two images would be necessary, one of the whole cheesecake (which shows both the crust and decorations) and one of a slice (to show the interior of the dessert) of cheesecake. I am pleased with how these images turned out, considering they are in focus, have bright lighting, and the plating adds additional details. I will soon attempt to edit the slice of cheesecake in the second image to face the other direction using Photoshop. Since my other photos of cheesecake slices looked better pointing to the left, it would look neater if this slice of cheesecake faced the same way; I took the images of this cheesecake and the vegan no-bake cheesecake in the same location with the same plates, and therefore, it would show more of a comparison between the two recipes if they faced the same direction.
Homemade Vegan No-Bake Oreo Cheesecake:


Of the six final photoshoot images of the vegan no-bake cheesecake, I narrowed it down to two. As I wouldn’t be displaying images to show how to make the no-bake and vegan no-bake cheesecake, I needed fewer images for my double-page spread. I chose the high-angle shot of the whole cheesecake as I find them more suitable for revealing the crust and topping of the dessert, rather than solely the top, which may appeal to my readers more. For the second image, I chose this shot as the interior looked neater, with the Oreos evenly dispersed throughout; the other photo I took had a large chunk of Oreo in the center, which some may not enjoy and view as inconsistent. A minor detail in the cheesecake slice image is a few crumbs on the plate, which I will try to edit. Although I wiped it before filming, the fragile crust most likely released more crumbs when adjusting the plate. The plate with the slice of cheesecake also looked chipped due to its opacity and angle when I took the shot. To eliminate this chip, I will use the Brush tool in Photoshop to paint over it.
Bakery’s Cookies and Cream Cheesecake:


Like the no-bake and vegan cheesecakes, I needed fewer photos of the bakery’s cheesecake; I didn’t bake the dessert, and therefore I only needed to photograph the final product of the cheesecake. The high-angle image in the first image was the most suitable for my magazine's double-page spread since it showcases all of the cheesecake’s details, and the quality is good enough to display as a full-page image (if I decide on this layout). The side view of the cheesecake was also most suitable for my magazine’s double-page spread since the quality was sufficient, the decorations on the subject were in focus, and it was neat. For all of the cheesecakes, I liked the high angle and side view shots the most to display both the exterior and interior of the desserts and give as much detail to my readers on how the final product looks. I slightly increased the brightness setting on my iPhone before taking these shots to make the subject clearer. Especially with the dark decorations on this cheesecake, increasing the brightness ensured that my camera picked up its details.
Final Photoshoot Part 2 (Local Bakery Photoshoot):


The only images from my final photoshoot at the bakery that I deemed necessary for my magazine’s cover image were the three above. Since my article will solely be about Oreo cheesecake, the shots I took of Nadia (the bakery owner) preparing a DoorDash order would be irrelevant. The images I took of the bakery’s exterior and interior would also be unimportant as my audience may be uninterested in seeing the layout of the bakery, considering my magazine only focuses on baking. Of the images I took of Nadia making the Oreo cheesecake, the best quality ones were of her whipped cream and drizzling chocolate sauce onto the cheesecake. They had sufficient lighting and were clear on what Nadia was doing (I took the shots while she was in motion). The third shot is also meaningful as it displays the final product of the cheesecake, Nadia's whole body in the frame, and a glimpse of her working environment.
Cover Choice:

Considering my magazine's regular Oreo cheesecake recipe will be the spotlighted recipe in my double-page spread, I also chose to feature it on my magazine’s cover image. The decorations on the cheesecake are elaborate, and therefore, it could encourage amateur bakers that they can bake a recipe of any level, especially with the help of my magazine. Of the shots I took of this cheesecake, I chose the one above as I find high angles most suitable in this context. In particular, it provides a perspective of the whole dessert—rather than an overhead shot (for example) which shows only the top. The subject is well-lit throughout, the subject's features are in focus, and the decorations are eye-catching. Regardless, I want to edit this shot in Photoshop to remove the line at the bottom of the cheesecake—the bottom of the springform pan. Bakers often leave the bottom of the springform pan on the cheesecake as it is difficult to remove, and due to the fragile crust, the cheesecake can easily ruin. I left the bottom of the springform pan on the dessert as I didn’t want to damage its crust, yet it looked distracting. Hence, I will attempt to edit the image by removing the visibility of the springform pan. It is worth noting that the cheesecake crust is textured, and therefore, it may be harder to remove the crust as I would have to recreate the texture (unless I figure out another method other than using the Brush tool).

While editing the visibility of the springform pan in my cover image through Photoshop, I also want to edit or remove its background; an object appears to the left of the cheesecake (circled in red), and the surface looks scratched and slanted.
I will also like to use the following image from my trial final photoshoot in my magazine:

Although this image was from my trial final photoshoot, I would like to use it in my magazine instead of the crust image from my final photoshoot. The shot above shows my hand, which demonstrates the action (pressing down on the crust to pack it together and prevent it from cracking later on). Therefore, it is clearer what the image is showing (rather than my final photoshoot image of the crust, where I only showed it in the pan).
With the help of my shot list, I prepared and organized my ideas before implementing my final photoshoot. It gave me an overview of what shots and angles I had to take, the equipment I needed, and my plans for the photoshoot; it acted as a reference and ensured I didn’t forget to take the shots I needed. Nevertheless, I strayed slightly from my shot list as I realized midway through the photoshoot that I wanted more than one image of each cheesecake—two images were more appropriate, as I can show both the exterior and interior of the dessert and clarify how the cheesecake should look.
By photographing in an area right by a windowsill (rather than my kitchen), my images were well-lit, and I didn’t experience issues with shadowy surfaces. Plating the cheesecakes on cake stands and decorative plates further enhanced my shots by adding decorativeness—especially the red, green, and blue plate, which added color to the white and black cheesecake. I was also pleased with my angles and the finished products of the cheesecake. As I’ve never made an Oreo cheesecake before, let alone a no-bake or vegan no-bake one, I was unsure how the desserts would turn out—yet, they ended up meeting my goals. While taking these shots, a challenge I faced was photographing the subjects in focus. Since the cheesecakes' filling was shiny, and the top had plenty of decorations, my phone had difficulties focusing on each detail. The cheesecake colors were mainly black and white, often making my images dark; I subsequently had to take multiple shots to achieve my intended results. In particular, photographing the bakery’s Cookies and Cream cheesecake was the hardest when photographing the dessert in focus; the center had finely crushed Oreo crumbs, and it took numerous tries for my phone to focus on the center of the cheesecake and not look dark.
With the following in mind, my photoshoot was a success, and I met the goals I aimed to accomplish. Due to my shot list, I was more successful than in previous photoshoots, as it was an easy and effective method for organizing my ideas. This photoshoot allowed me to take most of my magazine’s images, gain more knowledge on the importance of angles for specific situations, and understand the significance of post-production/editing towards improving one’s shots. With these successes came some challenges, such as photographing the subjects without blurriness and looking excessively dark; I filmed in locations with more natural lighting, increased the brightness before taking the shots, and pressed on my iPhone screen before photographing the subjects to ensure they were in focus. Despite narrowing down images from my final photoshoot, it may seem that I still have many. To clarify, I aim to have an image-filled, descriptive baking magazine that anyone can follow along with, hence my intention of photographing each step in baking Oreo cheesecake.


Comments